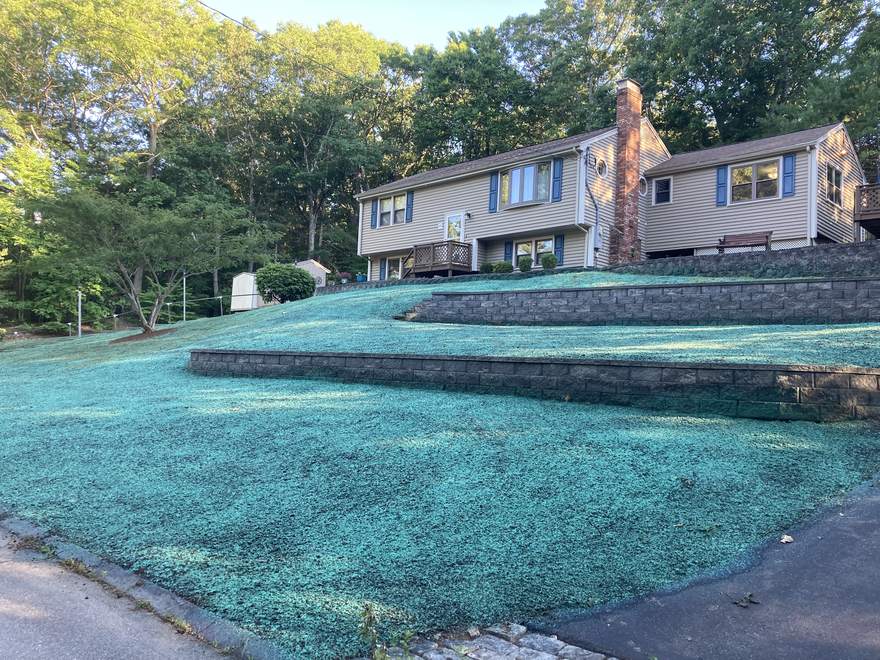
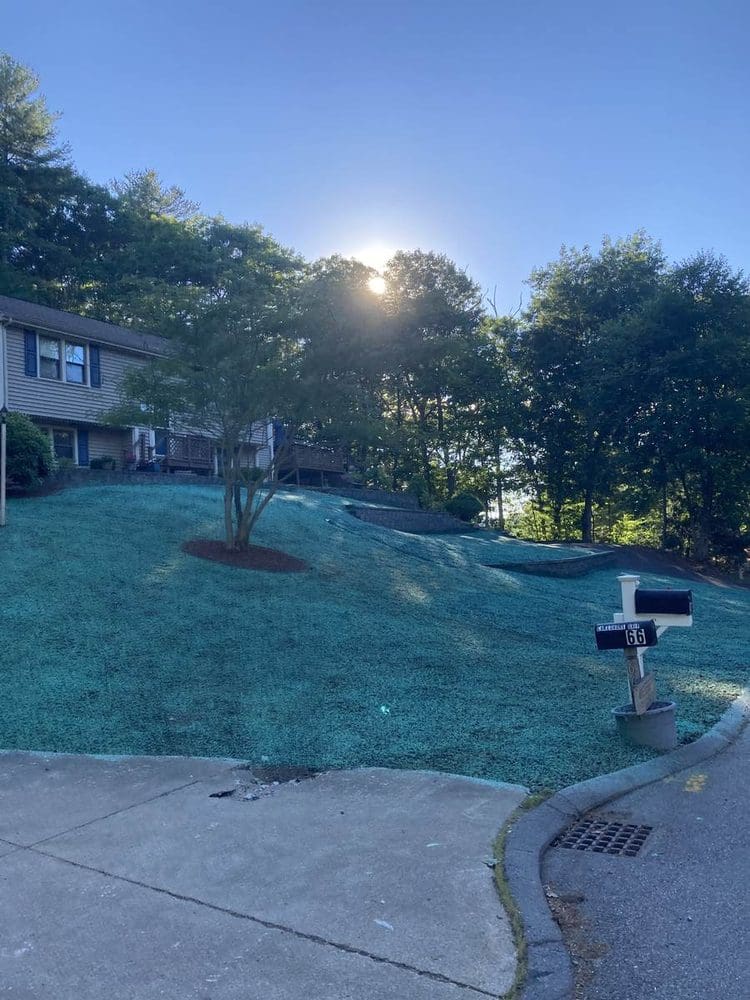
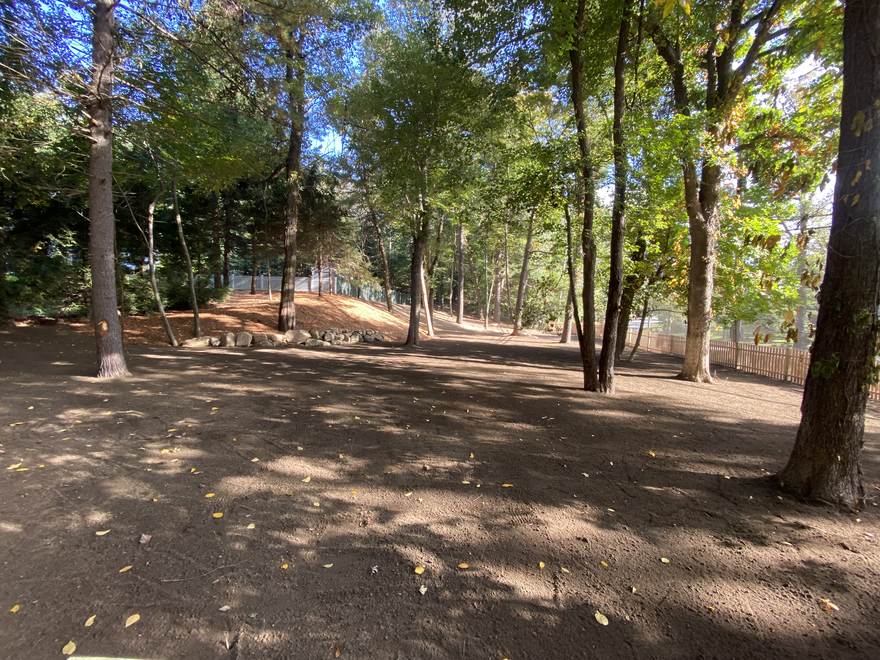
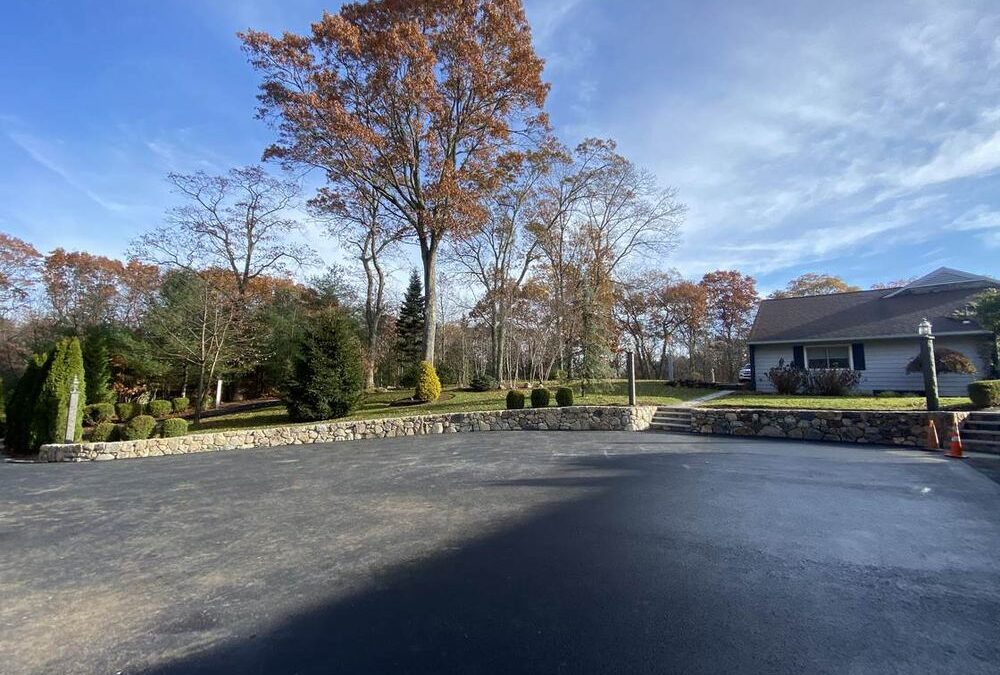
Hydroseeding vs sod comes down to time versus money. Sod gives you a finished lawn in a day for about $1.50 to $3.00 per square foot installed, while hydroseeding costs roughly $0.15 to $0.40 per square foot and takes 6 to 10 weeks to fill in. For most Norfolk County yards over 3,000 square feet, hydroseeding is the better value. However, sod wins on steep slopes, small front yards and anywhere you need a usable lawn right away.
Hydroseeding vs sod: cost per square foot in Norfolk County
Price is the first thing most homeowners in Wrentham and Franklin ask about, so let’s start there. The numbers below are typical installed ranges for our area. They include soil prep on a normal lot but not major grading or fill.
Method
Cost per sq. ft.
5,000 sq. ft. lawn
10,000 sq. ft. lawn
Hydroseeding
$0.15–$0.40
$750–$2,000
$1,500–$4,000
Sod (installed)
$1.50–$3.00
$7,500–$15,000
$15,000–$30,000
So on a half-acre lot, sod can cost ten times what hydroseed costs. That gap is the whole reason the hydroseeding vs sod question gets searched so often. In addition, sod prices in Massachusetts have climbed, because most rolls come from farms in the Connecticut Valley or Rhode Island.
What is included in a hydroseeding price
A hydroseed quote covers the slurry itself: seed, mulch fiber, tackifier and starter fertilizer, sprayed from a tank truck. It also includes final grading and a light rake. What it usually does not include is loam. If your lot is raw fill, budget another $0.50 to $1.00 per square foot for screened loam spread 4 to 6 inches deep.
What is included in a sod price
A sod quote covers the rolls, delivery, laying, rolling and starter fertilizer. Sod also needs loam and a smooth, firm base, because bumps show immediately. So the prep line is often the same for both, and material and labor are what push sod up.
Hydroseeding vs sod: how fast will you have a lawn?
This is where sod earns its price.
Sod: Green the day it is laid. Roots knit in 2 to 3 weeks. Light foot traffic after 3 weeks, normal use after 5 to 6 weeks.
Hydroseed: Sprouts in 7 to 14 days. Looks like a lawn at 4 to 6 weeks. First mow around week 4 or 5. Ready for kids and dogs at 8 to 12 weeks.
For example, a Foxboro family closing on a new build in early May can have a hydroseeded lawn ready for a July 4th cookout. A family closing in August cannot, because summer seedings struggle. They should sod or wait for a September hydroseed. Timing, not just budget, should drive your hydroseeding vs sod decision.
Watering requirements for hydroseeding vs sod
Both methods live or die on water during the first month. However, the schedules differ. Sod needs heavy water right away to keep the rolls from shrinking. Hydroseed needs light, frequent water to keep the top inch damp without washing the slurry away.
Watering new sod
Water within 30 minutes of laying, soaking through to the soil below.
Days 1–10: water once or twice a day, about 1/4 inch each time. Lift a corner; the soil should be moist.
Days 10–21: cut back to every other day, deeper.
Week 4 and beyond: 1 to 1.5 inches per week, ideally in one or two deep soakings.
Watering hydroseed
Days 1–14: light watering 2 to 3 times a day, 5 to 10 minutes per zone. Keep the mulch damp, never soggy.
Days 14–28: once a day, slightly longer, as seedlings reach 2 inches.
Weeks 4–8: every other day, deeper, to push roots down.
After 8 weeks: 1 inch per week, same as an established lawn.
Either way, plan on running water for a month. Without irrigation, hydroseed is harder to keep damp on a hot week. Therefore, we often recommend sod for homeowners in Plainville or Bellingham who travel in summer.
Best seasons for a new lawn in New England
Massachusetts sits in the cool-season grass zone, where lawn grasses grow best in 50- to 65-degree soil. That gives us two windows, and one is clearly better for hydroseeding vs sod alike.
Late summer and early fall (best)
Late August through early October is prime time for both methods in Norfolk County. Soil is warm, nights are cooling, and weed pressure drops. In addition, fall rains do part of the watering for you. A September hydroseed in Wrentham usually looks better the following May than an April seeding does in June.
Spring (good, with caveats)
Mid-April through late May works, once the ground has thawed and dried. However, spring seedings face crabgrass, and you cannot use a standard pre-emergent on new seed. Sod handles spring better for that reason. Also, a wet May can delay the job by weeks.
Summer (avoid for seed)
Hydroseeding in July heat is a gamble, because seedlings dry out in hours. Sod can go in during summer if you commit to heavy watering, but it will stress. If you must have a lawn in July, sod is the only realistic option.
Seed blends that work in Norfolk County
The seed in the tank matters as much as the method. Cheap “contractor mix” is mostly annual rye and fades in a year. A good hydroseed blend for Wrentham, Norfolk and Franklin looks like this:
Turf-type tall fescue (50–70%). Deep roots, drought tolerance and good wear. It handles our rocky glacial soils and dry Augusts better than anything else.
Kentucky bluegrass (15–30%). Spreads by rhizomes, so it fills bare spots. Slower to germinate (14–21 days) but gives that dark, dense look.
Perennial ryegrass (10–20%). Germinates in 5 to 7 days and holds soil while the others catch up.
Fine fescue (optional). Added for shady yards under the oaks and pines common around Foxboro and Medway.
Sod in Massachusetts is almost always a Kentucky bluegrass blend. Bluegrass sod is beautiful, but it wants full sun and regular water. So if your yard is shady, a fescue-heavy hydroseed will outperform sod within two years. The UMass Extension landscape program publishes seed recommendations for Massachusetts if you want to go deeper.
Soil prep: the step that decides everything
The lawn is only as good as the 4 inches under it. Skipping prep to save money is the most common mistake in hydroseeding vs sod projects, and it costs more later. Here is what proper prep looks like here.
Clear and rough grade. Remove debris, rocks over 2 inches, and old sod. Grade so water runs away from the house.
Soil test. Norfolk County soils tend to be acidic, often pH 5.0 to 5.5. Grass wants 6.2 to 6.8, so lime is cheap insurance.
Add loam. Spread 4 to 6 inches of screened loam over new construction or fill. On existing yards, 2 inches may be enough.
Amend and till. Work in lime and starter fertilizer. Compost helps our sandy pockets hold water.
Fine grade and firm. Rake smooth, then roll lightly. Footprints should sink about a half inch.
Our sitework crews handle grading and loam, and our hydroseeding truck follows within a day. That sequence matters, because a prepped lawn that sits for a week grows weeds first.
Slopes, erosion and drainage
Slopes change the hydroseeding vs sod answer. A grade up to about 3:1 (three feet across per foot of rise) is fine for hydroseed, because the mulch fiber and tackifier hold seed through normal rain. Steeper than that, and one thunderstorm can wash the slurry to the bottom.
Sod on a slope stays put if you stake it, but it can slide if it dries out before rooting. In addition, water runs off a slope before it soaks in, so both methods need shorter, more frequent watering there. For steep banks, we often use extra tackifier or an erosion blanket.
Low, wet spots are the other problem, since neither sod nor seed survives standing water. So if your yard in Norfolk or Medway ponds after a storm, fix the drainage first. Our water and drainage solutions page covers French drains, catch basins and regrading.
When sod wins
Sod is the right call more often than the price tag suggests. Choose sod when:
You need a lawn now. A house closing, a party or a listing photo in three weeks.
The area is small. Under 2,000 square feet, the cost gap shrinks to a few hundred dollars, and sod avoids weeks of mud.
It is the front yard. Curb appeal on a busy road like Route 1A or Route 140 is worth the money.
The timing is wrong for seed. Mid-summer, or late October when seed will not establish before frost.
Kids and dogs cannot stay off it. Sod takes traffic in 3 weeks; hydroseed needs 8.
When hydroseeding wins
Hydroseeding is our default for most new lawns in the Wrentham area. Choose it when:
Large areas. Over 4,000 square feet, the savings run into thousands of dollars.
You can pick the blend. Shade, drought, dog traffic. Sod comes in one or two options; seed comes in dozens.
Better long-term roots. Seed germinates in your soil, so roots go deep from day one. Sod roots must cross the seam between farm soil and yours.
Fall installs. A September hydroseed matches sod by the following June at a fraction of the cost.
New construction. Builders in Franklin and Bellingham use hydroseed almost exclusively.
Mistakes to avoid with either method
Most failed lawns we get called to fix share the same errors, whatever side of hydroseeding vs sod they started on.
Underwatering in week one. The top inch dries out in hours on a windy day. Set a timer.
Overwatering. Puddles wash seed and rot sod roots. Damp, not soaked.
Mowing too early or too low. Wait until grass hits 3.5 inches, then take off no more than a third.
Skipping lime. Acidic soil locks up fertilizer. A test costs $20.
Buying cheap seed. Annual rye greens up fast and dies next summer.
Applying crabgrass preventer. It stops your new grass seed too. Use a product labeled safe for seeding.
DIY or hire a pro?
Laying sod yourself is doable on a small, flat yard. Rolls weigh 30 to 40 pounds each, and a 2,000-square-foot lawn is about 200 rolls. However, you must lay it the day it arrives, because sod on a pallet in July heat cooks within 24 hours.
Hydroseeding is not a DIY job, because the tank truck and pump are not rental items. Homeowners can hand-seed small patches with a spreader and straw. For a whole yard, the even coverage from a hydroseed truck makes a visible difference. Our lawn installation team handles both sod and hydroseed, so you get an honest recommendation instead of a sales pitch for one method.
First-year care for your new lawn
The first year sets the lawn up for the next twenty. Here is the schedule we hand to clients across Norfolk County.
Weeks 1–4: Water as described above. No mowing until 3.5 inches. Stay off it.
Weeks 4–8: First mow at 3 inches with a sharp blade. Apply a second starter fertilizer at week 6.
Weeks 8–12: Spot-seed thin areas and spot-treat broadleaf weeds.
Month 3 onward: Switch to a regular fertilizer program with 4 to 5 applications per year.
First fall: Core aerate and overseed to thicken the stand, especially on hydroseeded lawns.
Late fall: Final mow at 2.5 inches, then winterizer fertilizer around Thanksgiving.
Expect a hydroseeded lawn to look 80 percent finished after the first fall and fully mature after the second spring. Sod looks finished immediately, but it needs the same fertilizer and aeration to stay dense. After year one, hydroseeding vs sod is hard to tell apart.
Frequently asked questions
Is hydroseeding cheaper than sod?
Yes, by a wide margin. Hydroseeding runs $0.15 to $0.40 per square foot in the Wrentham area, while installed sod runs $1.50 to $3.00. On 6,000 square feet, that is roughly $1,800 versus $13,000.
How long does hydroseed take to grow in Massachusetts?
Sprouts appear in 7 to 14 days. You will mow for the first time around week 4 or 5, and the lawn is ready for normal use at 8 to 12 weeks.
Can you hydroseed over an existing lawn?
Not effectively, because the slurry needs bare, loose soil. For a thin lawn, aeration and overseeding is the better fix. For a lawn that is more than half weeds, strip it and start over.
What is the best grass seed for Norfolk County, MA?
A blend of turf-type tall fescue, Kentucky bluegrass and perennial ryegrass. Lean toward fescue for drought and dog traffic, and add fine fescue for shade.
Does hydroseed need to be covered with straw?
No. The green mulch fiber in the slurry does what straw does, holding moisture and protecting seed, without the weed seeds in hay bales.
Get a free written estimate for hydroseeding or sod
Not sure which way to go? Ten Four Landscape & Construction installs both hydroseed and sod across Wrentham, Norfolk, Franklin, Foxboro, Plainville, Medway and Bellingham, and Seth will tell you which one fits your yard. Call (508) 505-5416 or request a free written estimate online.
Retaining wall cost in Massachusetts typically runs $40 to $110 per square foot of wall face installed, or roughly $150 to $600 per linear foot for a 3- to 4-foot wall. Segmental block sits at the low end, natural stone and poured concrete at the high end. In short, most residential walls in Wrentham, Norfolk and Franklin land between $6,000 and $25,000, and the biggest swings come from height, drainage and site access.
Retaining wall cost by material in Norfolk County
Material drives the first big fork in your budget. However, the labor behind the wall (excavation, base, drainage and backfill) is similar no matter what you pick. So the numbers below are installed prices, typical for the Wrentham and Norfolk County area. Every site is different.
Material
Per sq. ft. of face
Per linear ft. (3–4 ft tall)
Typical lifespan
Segmental concrete block
$40–$65
$150–$260
40–75 years
Pressure-treated timber
$25–$45
$100–$180
15–25 years
Boulder / rock wall
$35–$70
$140–$280
50+ years
Natural stone / fieldstone (dry-laid)
$60–$95
$240–$380
75+ years
Natural stone (mortared)
$75–$110
$300–$440
75+ years
Poured concrete (with veneer)
$65–$110
$260–$440
50–100 years
Segmental block (Versa-Lok, Allan Block, Techo-Bloc)
Segmental block is the workhorse of retaining wall cost in New England. The units interlock, drain well and handle frost movement better than mortared walls. For example, a 40-foot wall at 3 feet tall in Foxboro usually prices between $6,500 and $10,500 installed. Premium faces like Techo-Bloc add 15 to 30 percent.
Natural stone and fieldstone
Fieldstone walls look like they belong on an old Norfolk County farm, because they do. Dry-laid stone takes skilled hands and time to fit, so labor is the main cost. Expect $60 to $95 per square foot for dry-laid, and more for mortared work.
Boulder walls
Boulder walls use large glacial rocks, which are easy to find here. They need an excavator to set, so access matters more than with any other material. As a result, a boulder wall on an open lot in Plainville can be cheaper than block. The same wall in a tight backyard can cost more.
Timber walls
Pressure-treated timber is the cheapest option up front. However, it rots, and Massachusetts freeze-thaw cycles shorten its life to 15 to 25 years. We generally steer homeowners away from timber for walls over 2 feet or anything holding up a driveway. It works fine for garden beds and low terraces.
Poured concrete
Poured concrete walls need forms, rebar and often a stamped engineering plan. Because of that, they cost the most per foot. On the other hand, they are the right answer when a wall supports a structure or a steep driveway cut. Most homeowners add a stone veneer so the face is not bare concrete.
What drives retaining wall cost up or down
Two walls with the same length can differ by $10,000 in retaining wall cost. So it pays to understand the variables before you compare quotes.
Height. Cost per foot climbs sharply past 3 feet, and jumps again past 4 feet when engineering and permits kick in.
Site access. Can a mini excavator and a skid steer reach the wall? If material has to be wheelbarrowed through a gate, add 20 to 40 percent.
Soil conditions. Much of Wrentham and Norfolk sits on rocky glacial till with pockets of clay. Rock means slower digging; clay means more drainage work.
Drainage needs. A wall at the bottom of a slope or near a wet area needs more gravel, pipe and fabric.
Surcharge loads. A driveway, pool, patio or shed above the wall adds pressure and often requires geogrid.
Curves, corners and steps. Straight walls are fastest. Every corner, radius or stair tie-in adds cutting and layout time.
Demolition. Removing a failed wall first adds $1,500 to $5,000.
Height thresholds, engineering and permits in Massachusetts
Massachusetts treats retaining walls differently once they get tall. Under the state building code (780 CMR), a retaining wall that is 4 feet or more from the bottom of the footing to the top generally needs a building permit. Walls that support a surcharge, like a driveway or structure, can trigger a permit at any height. Therefore, always check with the building department in your town before you dig.
What “over 4 feet” really means for your budget
Once a wall crosses that line, most towns in Norfolk County want a stamped design from a Massachusetts-licensed engineer. That plan usually costs $800 to $2,500. In addition, the permit itself runs $50 to $300 depending on the town and project value. The engineer will also specify geogrid layers and drainage, which adds material and labor.
For example, a 60-foot wall at 5 feet tall in Franklin might price at $22,000 to $34,000 all in. The same length at 3.5 feet could come in under $14,000. So if your grade change allows it, two shorter terraced walls often cost less than one tall wall. They also look better and give you planting beds between them.
Wetlands and setbacks
Wrentham, Norfolk, Foxboro and Medway all have active conservation commissions. If your wall sits within 100 feet of a wetland, brook or pond, you may need a conservation filing. That adds time and sometimes fees. Meanwhile, zoning setbacks still apply, even for short walls.
What is behind the wall: drainage, backfill and geogrid
The part of the wall you never see is the part that decides whether it lasts. Water pressure, not soil weight, knocks down most walls in New England. So a large share of retaining wall cost goes into managing water. Here is what a properly built wall in this area includes.
Excavation and compacted base. A trench 6 to 12 inches deep, filled with compacted 3/4-inch crushed stone or dense-grade gravel. The first course is buried, usually one inch per foot of wall height.
Perforated drain pipe. A 4-inch perforated pipe wrapped in fabric runs along the base and daylights at the end of the wall or into a drywell.
Clean stone backfill. At least 12 inches of 3/4-inch clean stone directly behind the wall so water drops to the pipe instead of pushing on the block.
Filter fabric. Separates the stone zone from native soil so silt does not clog the drainage.
Geogrid. Layers of polymer mesh laid between courses and extended back into the soil. It ties the wall to the hillside. Most walls over 3 feet, and any wall with a surcharge, need it.
Compaction in lifts. Backfill goes in 6- to 8-inch layers, each one compacted before the next.
Skipping any of these steps saves a few hundred dollars today and costs thousands later. For example, we regularly see 10-year-old walls in Bellingham that bulged because there was no drainage stone behind them. Our water and drainage solutions often get planned alongside the wall for exactly that reason.
Frost, soil and other New England realities
Frost depth in Norfolk County runs about 48 inches. However, segmental block walls do not need footings below frost. Instead, they rely on a flexible, well-drained base that can move slightly and settle back. That is why the drainage stone matters so much here. A wall with saturated clay behind it will heave every February.
Poured concrete and mortared stone walls are different. Because they are rigid, they need footings below the frost line or they will crack. That means deeper excavation and more concrete, which pushes retaining wall cost up.
Rocky till and ledge
Much of the land between Wrentham and Foxboro sits on glacial till full of cobbles and boulders. Ledge shows up too, especially along the Route 1 and Route 1A corridors. If we hit ledge during excavation, the base may need to shift. As a result, an allowance for rock removal is common on larger jobs.
Timeline: how long does a retaining wall take?
Most residential walls take 2 to 7 working days once the crew arrives. Here is a rough guide for the Wrentham area, assuming normal access and no engineering delays.
Small garden wall (under 2 ft, under 30 ft long): 1–2 days
Standard block wall (3–4 ft, 40–80 ft long): 3–5 days
Engineered wall over 4 ft with geogrid: 5–10 days
Fieldstone or boulder wall: add 30–50 percent to the above
The lead time is often longer than the build itself. Engineering can take 2 to 4 weeks, and a permit another 1 to 3 weeks. So if you want a wall done by early summer, start the conversation in late winter. Block walls can go in any month the ground is not frozen.
Add-ons that change the price: steps, caps, lighting and more
A plain wall is rarely the whole project. Here are typical Norfolk County prices for common add-ons that change retaining wall cost.
Cap stones. Most block walls need a cap. Standard caps add $8 to $15 per linear foot; natural stone caps add $25 to $60 per linear foot.
Steps built into the wall. Block steps run $250 to $500 per step. Bluestone or granite treads run $400 to $900 per step. See our steps and stairways page for options.
Low-voltage lighting. Wall lights tucked under the cap cost $100 to $200 per fixture installed, plus a transformer.
Fence or railing on top. A drop over 30 inches next to a walking surface needs a guard. Budget $40 to $120 per linear foot.
Tie-in to a patio. Seat walls and patio edges are often built together. Our patios and walkways page shows how they combine.
Mistakes that inflate retaining wall cost
We see the same errors on failed walls across Norfolk County. Avoiding them is the cheapest way to control retaining wall cost.
No drainage. The number one killer. Gravel and pipe are cheap compared to a rebuild.
Base set on topsoil. The wall settles unevenly and joints open within a few winters.
Wrong block for the height. Garden-wall units used for a 4-foot wall will tip forward.
No geogrid under a driveway. The wall carries parked cars and slowly leans.
Skipping the permit. An unpermitted wall can hold up a home sale.
DIY or hire a pro?
A garden wall under 2 feet is a reasonable weekend project if you rent a plate compactor and buy the right base stone. You can build 30 feet of low wall for around $1,500 in materials. However, the labor is real, because even a small wall means moving tons of gravel by hand.
Anything over 3 feet, near a driveway, or on clay or a slope should go to a professional. The National Association of Landscape Professionals notes that retaining walls are among the highest-liability hardscape projects because failures happen slowly and expensively. A pro brings the right equipment, the experience to read your soil, and relationships with local building departments. Our retaining wall crews build in these towns every week, and Seth is on every job.
How to compare retaining wall cost quotes
A good estimate should be written and itemized. Ask each contractor to list the wall height, block brand, base depth, drainage details, geogrid layers, and who handles permits. If one retaining wall cost quote is far below the others, something is usually missing. Also, ask to see a wall they built at least five winters ago.
Frequently asked questions
How much does a 4-foot retaining wall cost per foot in Massachusetts?
Plan on $180 to $320 per linear foot for a segmental block wall right at 4 feet, installed with drainage and geogrid. If the wall measures 4 feet or more from the footing, add engineering and permit costs, which can push it to $350 or more per linear foot.
Do I need a permit for a retaining wall in Wrentham or Franklin?
Generally yes if the wall is 4 feet or taller from the bottom of the footing, or if it supports a surcharge like a driveway. Shorter walls usually do not need a building permit, but conservation rules may still apply near wetlands. Always confirm with your town’s building department.
What is the cheapest retaining wall material?
Pressure-treated timber is the cheapest up front at $25 to $45 per square foot. However, segmental block is the best value over time, because it lasts two to three times longer for only a bit more money.
How long does a block retaining wall last in New England?
A properly built segmental block wall with good drainage should last 40 to 75 years. Natural stone can last well over a century. Timber lasts 15 to 25 years, and less if it stays wet.
Does a retaining wall add value to my home?
Yes, when it solves a real problem. A wall that turns an unusable slope into a flat yard or patio, or stops erosion toward the foundation, typically returns a large share of its cost at resale. Walls that are failing or unpermitted do the opposite.
Get a free written estimate for your retaining wall
Ready to find out what a retaining wall costs on your property? Ten Four Landscape & Construction gives free written estimates across Wrentham, Norfolk, Franklin, Foxboro, Plainville, Medway and Bellingham. Call (508) 505-5416 or request a quote online, and Seth will walk your site with you.
In Norfolk County, the best window for spring and fall clean-up is late March through early May for spring and late October through early December for fall. Spring clean-up should wait until the ground thaws and firms up, which usually means the first or second week of April in Wrentham. Fall clean-up should start once most of the maples and oaks have dropped, then wrap up before the first lasting snow.
When to schedule spring clean-up in Norfolk County
Wrentham, Franklin and Foxboro sit in USDA zone 6a to 6b, and the last hard frost usually lands between May 1 and May 10. However, you do not need to wait for the last frost to clean up. You need to wait for the soil to dry out. Walking a crew and a wheelbarrow across a soggy lawn in March compacts the soil and tears out grass crowns. So the practical start date is when you can step on the lawn without leaving a footprint, usually the first week of April.
From there, the spring window runs about five weeks. Beds should be cleaned and edged before perennials push more than a few inches of growth. Crabgrass pre-emergent goes down when forsythia blooms, which is mid to late April here. Mulch goes on last, once the beds are clean and the soil has warmed. If you finish by Mother’s Day, you are in good shape.
Signs your yard is ready
The lawn has firmed up and no longer squishes underfoot.
Snow piles along the driveway have fully melted, including the shady north side.
Daffodils and crocuses are up, and forsythia is starting to show yellow.
Daytime highs are steadily in the 50s.
When to schedule fall clean-up in Norfolk County
The first frost in Wrentham typically arrives between October 10 and October 20. Leaf drop peaks from late October through mid November for maples, birches and ash. Oaks, which dominate wooded lots in Norfolk, Plainville and Foxboro, hold on until late November and sometimes into December. As a result, the fall clean-up window runs from about October 25 through the first week of December.
The goal is simple: get the leaves off the lawn before snow lands on them. Leaves that sit under snow all winter smother the grass and invite snow mold. In addition, the final mow, gutter cleaning and irrigation blow-out all need to happen before a hard freeze, which is usually around Thanksgiving. Most crews are fully booked by mid October, so call early. Our snow management customers often bundle fall clean-up with plow stakes in the same visit.
One pass or two?
On a lot with a few maples, one thorough pass in mid November is enough. On a wooded lot with mature oaks, two passes work far better. The first pass in early November clears the maples and keeps the lawn breathing. Then a second pass in late November or early December handles the oaks and whatever blew in from the neighbors. Two lighter passes usually cost less than one enormous one, because the crew moves faster and hauls less at a time.
What a proper spring and fall clean-up includes
A real clean-up is more than a leaf blower and a truck. Here is what you should expect from a full-service crew in spring:
Removal of sticks, branches, leftover leaves and winter debris from lawn and beds.
Raking out matted, winter-killed grass and any plow damage along the driveway.
Cutting back ornamental grasses and any perennials left standing over winter.
Pruning winter damage from shrubs and light shaping of hedges.
Re-cutting a clean spade edge on every bed.
First mow at a slightly lower height to remove dead tips.
Dethatching or light raking if the thatch layer is over half an inch.
Crabgrass pre-emergent and the first round of fertilizer.
Fresh mulch, usually 2 to 3 inches, kept away from trunks and stems.
A fall clean-up covers a different list:
Leaf removal from lawn, beds, patios, walkways and along fences, in one or two passes.
Cutting back spent perennials while leaving some seed heads for birds.
Final mow at a shorter height and a last edge along walks.
Gutter and downspout cleaning once the trees are bare.
Irrigation blow-out and shutting off outdoor spigots.
Fall fertilizer to feed roots through winter.
Wrapping or staking young evergreens on exposed corners.
Hauling everything away or composting it on site.
Leaf removal vs mulching leaves in place
You do not always have to haul leaves away. Mulch-mowing chops leaves into confetti that breaks down and feeds the lawn. It works well when the leaf layer is under an inch and the leaves are dry. Make two passes with a mulching blade and stop when you can still see grass through the pieces. Research from the UMass Extension landscape program and others shows mulched leaves do not harm turf or change soil pH in any meaningful way, even oak leaves.
However, mulch-mowing has limits. A wooded lot in Wrentham or Norfolk can drop three or four inches of oak leaves in a week. That volume clumps, mats and smothers grass. In that case, remove the bulk and mulch-mow only the last light layer. Mulched leaves also make excellent free mulch for beds at 2 to 3 inches deep. So a smart fall plan usually mixes both methods: haul the heavy stuff, chop the rest.
Bed edging, cutbacks and pruning
Bed edging is the single most visible part of any spring and fall clean-up. A crisp 3 to 4 inch spade edge makes even an ordinary yard look finished. Spring is the main edging season, because winter heaving softens last year’s line. A quick touch-up in fall keeps the edge sharp under the leaves. Our mulch and edging service handles both.
Cutbacks need a little judgment. Cut ornamental grasses in early spring, not fall, because the plumes protect the crown and look good in snow. Cut hostas, daylilies and peonies to the ground in fall once they yellow. Leave coneflowers and black-eyed Susans standing for the birds, then cut them in spring. Meanwhile, be careful with hydrangeas: panicle types like Limelight can be cut in spring, but the big blue mophead types bloom on old wood and should be left alone.
Pruning follows one rule: if it blooms in spring, prune it right after it blooms, never in a clean-up. That means lilac, forsythia, azalea and rhododendron stay untouched in April. Summer bloomers like spirea, rose of Sharon and potentilla can be shaped in early spring. For anything bigger than a hedge trimmer can handle, see our tree and shrub care page.
First and last mow heights
The first spring mow can go a notch lower than usual, around 2.5 inches, to clear dead tips and let sun reach the crown. After that, raise the deck to 3 to 3.5 inches for the rest of the season. Taller grass shades out crabgrass and holds up better in the July heat along the Route 1 corridor.
The last mow of the year should drop to 2 to 2.5 inches. Shorter grass going into winter resists snow mold and gives voles fewer places to hide. Time it after growth stops, usually mid to late November. If you plan to aerate and overseed, do it in September, well before the clean-up, so new grass has time to root. Our lawn mowing customers get the first and last cuts built into the schedule.
Gutters, drainage and water
Gutters are part of a proper fall clean-up because they fill with the same leaves. Clean them after the oaks drop, not before, or you will do it twice. Clogged gutters overflow at the foundation and feed the ice dams that plague Colonials and Capes across Franklin and Medway. In addition, make sure downspout extensions carry water at least 4 to 6 feet from the house.
Spring is the time to notice drainage problems, because the ground is saturated and every low spot shows. Look for standing water 24 hours after a rain, mushy corners near the driveway, and mulch that washes out of beds. Those are signs you may need a French drain, a dry well or regrading. Our drainage solutions team can fold that into a spring project.
Spring and fall clean-up pricing in the Wrentham area
Spring and fall clean-up pricing depends mostly on lot size, tree cover and how much has to be hauled. These are typical ranges for Wrentham, Norfolk, Franklin, Foxboro, Plainville, Medway and Bellingham, and every property is different.
Property
Spring clean-up
Fall clean-up
Quarter-acre lot, few trees
$250 to $500
$300 to $700
Half-acre lot, moderate trees
$450 to $900
$600 to $1,500
Acre or more, heavily wooded
$800 to $1,800
$1,200 to $3,500+
Fall usually costs more than spring because leaf volume drives labor and disposal. Most crews bill around $60 to $90 per person per hour, so a three-person crew for four hours lands near $800 to $1,000 plus dump fees of $50 to $150 per load. Add-ons carry their own prices: gutter cleaning runs $150 to $350, mulch runs $75 to $110 per yard installed, and core aeration runs $150 to $400.
What changes the price
Oak canopy: oaks drop late and heavy, which often means a second pass.
Fences, pools and beds: leaves collect in corners that a blower cannot clear quickly.
Slopes and ledge: common in Wrentham and Plainville, and slow to work on.
Disposal: on-site composting is cheaper than trucking to a transfer station.
Timing: a December call after the leaves are wet and matted costs more than a booked November slot.
Mistakes to avoid
The biggest spring mistake is starting too early. Raking a wet lawn in March pulls up grass and compacts clay soil that takes all season to recover. The second is mowing too short in April, which invites crabgrass. Third, do not pile mulch against tree trunks or shrub stems. A mulch volcano rots bark and shortens the life of the plant.
In fall, the classic error is leaving leaves on the lawn until spring. By April they are a brown mat over dead grass. Another is cleaning gutters before the oaks drop. Also, avoid cutting back every perennial to bare soil, because some crowns need their own dead foliage for insulation. Finally, do not fertilize in late December on frozen ground. The nutrients run off into the storm drain instead of the roots.
DIY vs hiring a pro
A quarter-acre lot with a couple of maples is a reasonable weekend project. Plan on 4 to 8 hours for spring and 10 to 20 hours for fall spread over several weekends. You will want a backpack blower at $300 to $600, a tarp, a spade for edging and a way to haul leaves. Most towns in the area require a transfer station sticker and accept yard waste on set days, so check your town’s schedule first.
Hiring makes sense once the lot passes a half acre, the trees are mostly oak, or the property has a pool, fences and a lot of beds. It also makes sense when your November weekends are worth more than the invoice. A crew of three with commercial blowers and a leaf loader does in three hours what takes a homeowner three weekends. Instead of guessing, get a written estimate for a one-time spring and fall clean-up and compare it to your own time. Many customers roll it into a property maintenance plan that covers mowing, mulch and clean-ups on one schedule. You can see the full scope on our spring and fall clean-up service page.
Frequently asked questions
Should I leave the leaves for pollinators?
You can, in beds and along wood lines. Many native bees and butterflies overwinter in leaf litter. So keep a 2 to 3 inch layer in planting beds and under trees, but clear the lawn, walkways and drains.
When should I book a fall clean-up in Wrentham?
Book by early October for a November slot. Good crews fill their fall calendar fast, and late callers end up waiting until the leaves are wet and matted.
Is it too late for a clean-up in December?
No, as long as the ground is bare. A December clean-up is common on oak-heavy lots. However, once snow covers the lawn, the job waits until spring.
Do I still need a spring and fall clean-up if I have a mowing service?
Usually yes. Weekly mowing does not include bed work, cutbacks, edging, gutters or bulk leaf removal. Ask whether clean-ups are part of your contract or billed separately.
Can spring clean-up include lawn repair?
Yes. Spring is a good time to patch plow damage, rake out dead spots and top-dress bare areas. For larger repairs, ask about aeration and overseeding, which works best in early fall.
Book your spring and fall clean-up
Want your yard cleaned up on time, at the right height, with nothing skipped? Ten Four Landscape & Construction has handled spring and fall clean-up across Wrentham, Norfolk, Franklin, Foxboro, Plainville, Medway and Bellingham since 2012, with Seth on every job. Call (508) 505-5416 or request a free written estimate today.
The typical paver patio cost in Massachusetts runs $20 to $45 per square foot installed, so a 16×20 patio usually lands between $6,400 and $14,400. That price covers excavation, a compacted gravel base, the pavers, edge restraint and polymeric sand. However, steps, seat walls, a fire pit or lighting add to the total, and we break each of those down below.
Paver patio cost per square foot in Norfolk County
Most homeowners in Wrentham, Franklin and Foxboro pay between $20 and $45 per square foot for a professionally installed paver patio. The low end covers a basic concrete paver in a simple running-bond pattern on a flat, easy-access lot. The high end covers large-format or permeable pavers, fancy borders and a sloped site that needs extra base work. These are typical ranges for the Norfolk County area, and your site will move the number up or down.
Here is how a typical installed price breaks down:
Materials (35 to 45%): pavers, base stone, bedding sand, edging, polymeric sand and geotextile fabric.
Labor (40 to 50%): excavation, base compaction, screeding, laying, cutting and cleanup.
Base prep and disposal (10 to 20%): hauling out soil and sod, plus trucking in and compacting stone.
Material costs
Standard concrete pavers from brands like Techo-Bloc, Unilock or Belgard run $4 to $9 per square foot at the supply yard. Premium slabs, textured or tumbled styles and permeable pavers run $9 to $16. In addition, you need about $2 to $4 per square foot of base stone, sand and edging. So material alone usually lands at $7 to $20 per square foot before anyone lifts a shovel.
Labor costs
Labor is the biggest slice of any paver patio cost because pavers are set by hand. A three-person crew can lay roughly 150 to 250 square feet per day on a straight pattern. Complex patterns, curves and tight cuts slow that down. Therefore, a patio with a soldier-course border and a circle kit costs more per foot than a plain rectangle.
Base prep costs
Base prep is where cheap patios fail and good ones last. Around Wrentham, crews often hit rocky glacial till, clay pockets and the occasional ledge. As a result, excavation can take longer than the paver laying itself. Disposal fees for soil run $300 to $800 per job.
Paver patio cost by size: 12×12, 16×20 and bigger
Size drives the total, but not in a straight line. Small patios carry a higher per-square-foot rate because delivery, setup and disposal costs get spread over fewer feet. Larger patios get cheaper per foot, then climb again once you add features. Use the table below as a starting point.
Patio size
Square feet
Typical installed cost
10×10
100
$3,000 to $4,800
12×12
144
$3,500 to $6,500
16×20
320
$6,400 to $14,400
20×24
480
$9,600 to $21,600
Most contractors in the area carry a minimum job size around $3,000 to $4,000. For example, a 12×12 patio behind a Plainville split-level with easy backyard access might come in near $4,500. Meanwhile, the same 144 square feet on a sloped Norfolk lot with a walkout basement might need a small retaining wall and land closer to $9,000.
Pavers vs bluestone vs poured concrete
Paver patio cost sits in the middle of the three common patio materials. Poured concrete is cheaper up front. Natural bluestone is more expensive. However, price is only half the story in a freeze-thaw climate.
Material
Installed cost per sq ft
Frost performance
Lifespan
Poured concrete
$10 to $18 (stamped $15 to $24)
Cracks and heaves; hard to repair
15 to 25 years
Concrete pavers
$20 to $45
Flexes with frost; single units can be reset
30 to 50 years
Bluestone (dry-laid)
$35 to $60
Flexes well; heavy pieces stay put
50+ years
Bluestone (mortared on slab)
$50 to $80
Only as good as the slab beneath
25 to 40 years
Concrete slabs crack because New England frost pushes the ground up unevenly. Once a slab cracks, you live with it or replace it. Pavers, by contrast, are hundreds of small pieces on a flexible base. If a section heaves, a crew lifts those pavers, fixes the base and resets them. That repairability is a big reason pavers dominate the neighborhoods along Route 1 and Route 140.
Bluestone gives you a classic New England look that matches older Franklin and Medway colonials. It costs more because the stone comes from Pennsylvania and New York quarries and is heavy to cut and set. For a full comparison of options, see our patio and walkway installation page.
Base depth for New England frost
The frost line in eastern Massachusetts is roughly 48 inches, but nobody digs a patio that deep. Instead, a proper base handles frost by draining water and spreading loads. Water that cannot pool cannot freeze and lift your pavers. Here is what a good base looks like in Norfolk County:
Excavate 9 to 12 inches below finished grade, and remove all topsoil and organic material.
Lay geotextile fabric over clay or silty soil so the stone base cannot sink into it.
Install 6 to 8 inches of dense-grade crushed stone in 2 to 3 inch lifts, compacting each lift with a plate compactor.
Screed 1 inch of concrete sand as a bedding layer, never more.
Set the pavers and install edge restraint, then compact and sweep in polymeric sand.
Pitch the whole patio away from the house at 1/8 to 1/4 inch per foot. In addition, wet spots near the low corner of a yard may need a drain or dry well tied in before the base goes down. Our drainage solutions team handles that as part of the same project. Skipping the base to save $1,500 is the most expensive mistake a homeowner can make, because the fix means tearing the patio out.
Add-ons that raise your paver patio cost
Most people start with a rectangle and end up with an outdoor room. Each feature below carries its own price, and stacking several can double the project. These are typical Wrentham-area ranges.
Paver steps: $1,500 to $4,500 per run of two to four steps, depending on width and material. See our steps and stairways work.
Seat walls: $175 to $325 per linear foot for an 18-inch wall block with caps.
Fire pit: $1,800 to $4,500 for a wood-burning paver kit; $4,500 to $9,000 for a gas unit with a plumbed line. Browse our fire pits and seating areas.
Low-voltage lighting: $1,500 to $4,000 for 8 to 14 fixtures, a transformer and wiring.
Retaining wall to level a slope: $40 to $80 per square foot of wall face. Learn more about retaining walls.
Outdoor kitchen: $8,000 to $30,000 and up, depending on appliances, counters and utilities. See outdoor kitchens.
For example, a 16×20 patio at $10,000 with a 12-foot seat wall, a wood fire pit and lighting often totals $16,000 to $19,000. That is still less than a comparable deck in many cases, and the patio will outlast it.
Permits, setbacks and rules in Wrentham, Norfolk and Franklin
A ground-level paver patio usually does not need a building permit in most Norfolk County towns. However, every town is different, so a quick call to the building department is worth five minutes. Several other rules can apply:
Setbacks: patios often must sit 10 to 20 feet from side and rear lot lines, depending on your zoning district.
Wetlands: any work within 100 feet of a wetland, pond or stream needs Conservation Commission review. Wrentham, Norfolk and Foxboro have plenty of wetlands, so check your plot plan first.
Fire pits: permanent wood-burning pits may need fire department sign-off, and gas lines require a licensed gas fitter.
Dig Safe: Massachusetts law requires a call to 811 before any digging. It is free, and the utilities mark their lines within three business days. Details are on the Mass.gov Dig Safe page.
A good contractor handles the Dig Safe ticket and flags any setback or wetland question before quoting. If a permit is needed, expect $50 to $250 in town fees and a week or two of lead time.
How long does a paver patio take to build?
Once you sign, scheduling depends on the season. In March and April, most crews can start within two to four weeks. By June, lead times stretch to six to ten weeks. The build itself is faster than most people expect:
12×12 patio: 2 to 3 working days.
16×20 patio: 3 to 5 working days.
Patio with steps, seat wall and fire pit: 1 to 2 weeks.
The paver season in Massachusetts runs from early April until the ground freezes, usually late November or early December. Fall is a great time to build, because the soil is dry and crews are less slammed. Meanwhile, booking in January or February for a spring start often locks in the best paver patio cost and the first open slots.
Why paver patio quotes differ so much
Three quotes for the same 16×20 patio can come back at $6,000, $9,500 and $13,000. That spread is rarely about greed. Instead, it usually comes down to what each contractor is actually building. Ask every bidder these questions:
How deep is the base, and is it compacted in lifts or dumped in at once?
Are you using geotextile fabric over the subgrade?
What edge restraint holds the perimeter, and is it spiked every 8 to 12 inches?
Is the joint sand polymeric or plain mason sand?
Which paver line and thickness are you quoting? A 60mm paver is standard for patios.
Who is on site each day, and do you carry liability and workers’ comp insurance?
Mistakes that cost homeowners money
The most common mistake is taking the lowest bid without reading the base spec. A 4-inch base on clay will heave within two winters. Next is skipping drainage on a lot that already puddles. Another is forgetting access: if a skid steer cannot reach the backyard, everything moves by wheelbarrow and labor jumps.
DIY vs hiring a pro
A handy homeowner can build a small paver patio. Materials for a 12×12 run about $1,500 to $2,800, plus a plate compactor rental at $80 to $120 per day and a stone delivery fee. Expect 30 to 50 hours of hard labor, mostly digging and moving stone. That is a fair trade for a 100 to 150 square foot pad on flat ground.
Hire a pro when the patio is over 150 square feet, the yard slopes, you want steps or walls, or a gas line is involved. Base compaction is the step DIYers most often get wrong, and it is the one you cannot fix later. In short, the labor portion of your paver patio cost is mostly insurance against tearing it out. Seth has built patios since 2001, and Seth is on every job, so the base spec on the quote is the base you get. Browse our landscape construction services for the full scope we handle.
Long-term maintenance costs
Pavers cost more up front than concrete, but they cost less over 30 years. Plan on refreshing polymeric sand every 3 to 5 years at $1 to $2 per square foot. Sealing is optional and runs $1.50 to $3 per square foot every few years, mostly for color and stain resistance. If a paver settles, a crew can reset that spot for a couple hundred dollars. Compare that to a cracked slab, which is a full replacement.
Frequently asked questions
What is the cheapest way to lower paver patio cost?
Choose a standard 60mm concrete paver in a running-bond or herringbone pattern, keep the shape rectangular, and skip borders and curves. Also, build in fall when crews have open days. A basic 12×12 in the Wrentham area can land near $3,500 to $4,500 that way.
Does a paver patio add home value?
Yes. National remodeling surveys put patio and outdoor living returns around 50 to 80 percent of cost, and buyers in Norfolk County expect usable outdoor space.
Are permeable pavers worth the extra cost?
They cost $5 to $10 more per square foot, but they let stormwater soak through instead of running toward your foundation. On a wet lot or one near a wetland buffer, they can save you a drainage system and simplify Conservation Commission approval.
Can you build a paver patio in winter in Massachusetts?
Not once the ground freezes. Frozen subgrade cannot be compacted, and polymeric sand will not cure below 32 degrees. Most crews stop in December and start again in April, so use the winter to plan and lock in a spring date.
How much does a 20×20 paver patio cost?
A 400 square foot patio typically runs $8,000 to $18,000 installed in the Norfolk County area, before add-ons like steps or a fire pit.
Get a free written estimate on your patio
Ready to find out your real paver patio cost instead of a guess? Ten Four Landscape & Construction serves Wrentham, Norfolk, Franklin, Foxboro, Plainville, Medway and Bellingham with free written estimates and an owner on every job. Call Seth at (508) 505-5416 or request a quote online today.